
This guide will walk you through the complete process of importing a template kit using Wira Kit. You can import templates directly from the library or upload a template kit ZIP file manually.
Method 1: Import from Browse Template Kits
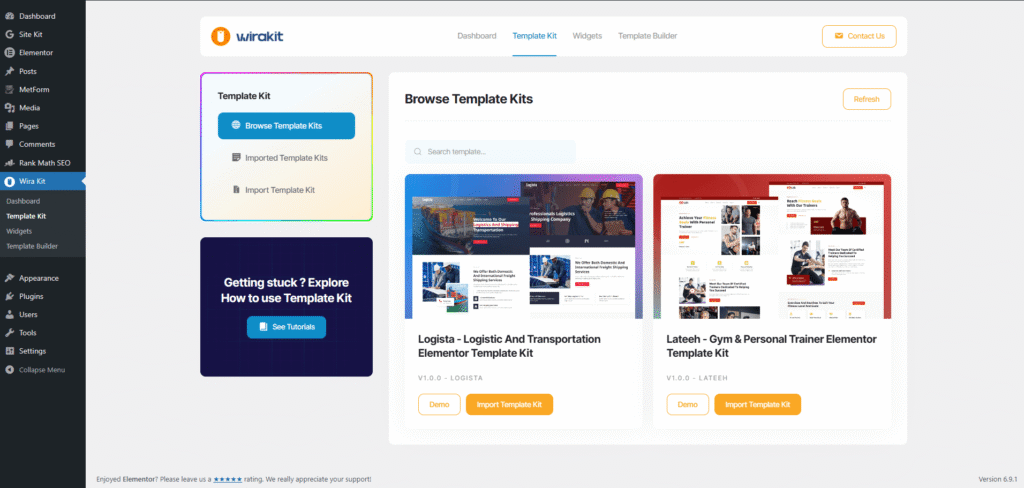
- 1. Go to Wira Kit → Template Kit → Browse Template Kits.
- 2. Browse the available template kits.
- 3. Click Import Template Kit on the template you want to use.
- 4. The system will prepare the template for installation.
Method 2: Import via ZIP Upload
If you have a template kit ZIP file:
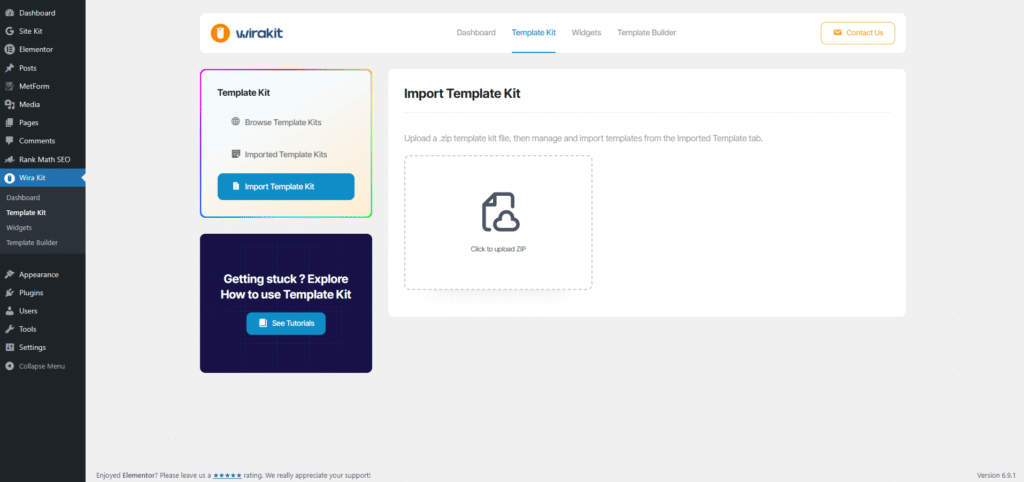
- 1. Go to Wira Kit → Template Kit → Import Template Kit.
- 2. Upload your template kit ZIP file.
- 3. Click Import.
- 4. Once the upload is complete, the template kit will appear under Imported Template Kits.
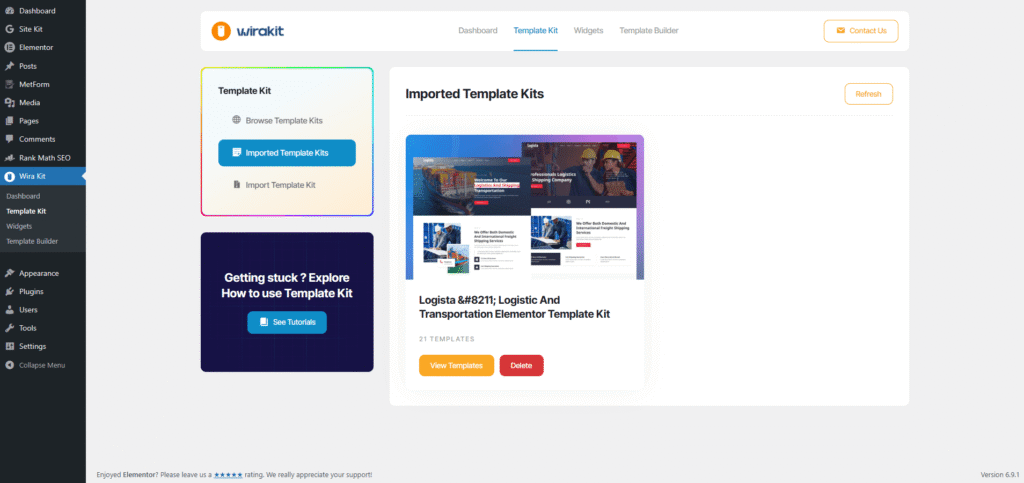
After Importing the Template Kit
Step 1: Install Required Plugins
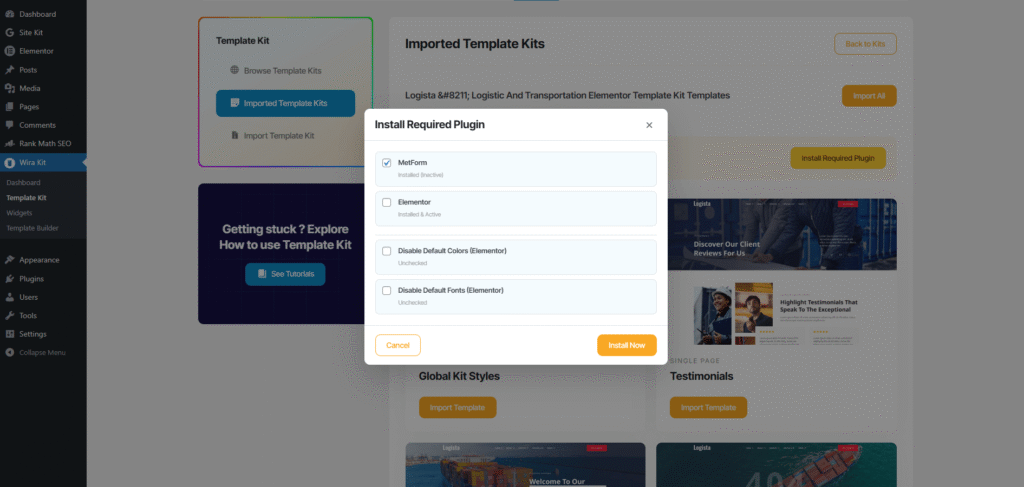
When opening the imported template kit, you may see a popup titled Install Required Plugin.
- 1. Check the required plugins (such as MetForm if needed).
- 2. Click Install Now.
- 3. Wait until the installation process is completed.
Step 2: Disable Elementor Default Fonts and Colors
For best design consistency:
- 1. In the required plugins popup, make sure:
- Disable Default Colors (Elementor) is checked.
- Disable Default Fonts (Elementor) is checked.
- 2. This ensures the template design matches the original styling.
Importing Template Parts (Important Order)
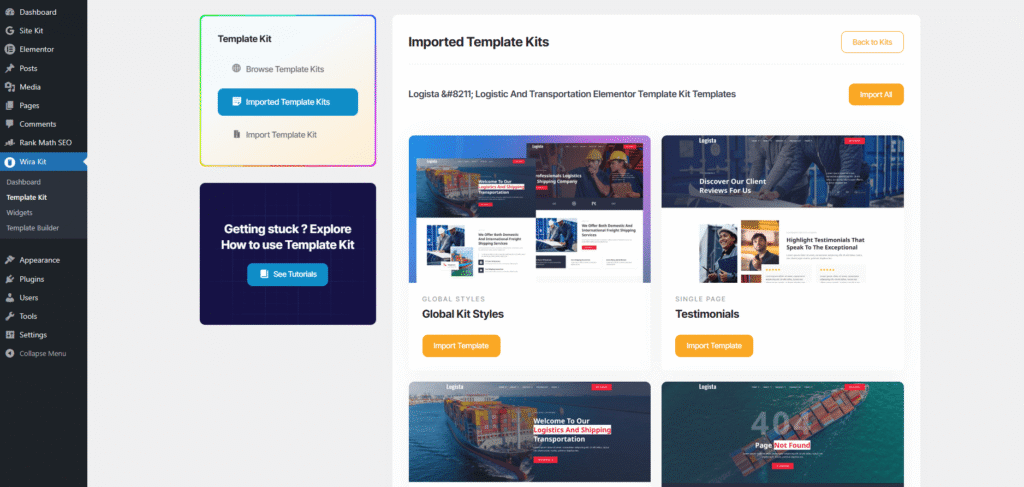
After plugin installation:
This ensures the correct design system is applied before importing pages.
Creating Pages and Inserting Imported Templates
After successfully importing the template kit and required template parts, you must manually insert the templates into newly created pages.
Step 1: Create a New Page
- Go to Pages → Add New.
- Enter your desired page title (for example: Home, About, Services, Contact).
- Click Edit with Elementor.
Step 2: Insert the Imported Template
- 1. Inside Elementor, click the Folder icon (Template Library).
- 2. Go to the My Templates tab.
- 3. Locate the imported template.
- 4. Click Insert.
- 5. Click Apply to load the design into the page.
Step 3: Publish the Page
- After inserting the template, review the content.
- Replace demo text, images, and branding with your own.
- Click Publish.
Important Note
Importing a template kit does not automatically create pages on your website.
All templates must be manually inserted into newly created pages using Elementor.
Assigning Special Templates
Some templates require manual assignment.
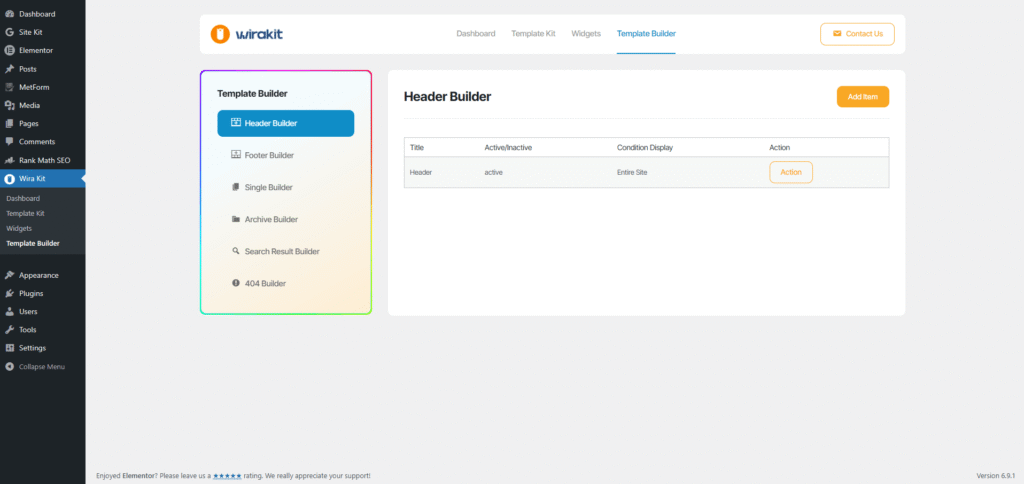
Templates Starting with “Builder -”
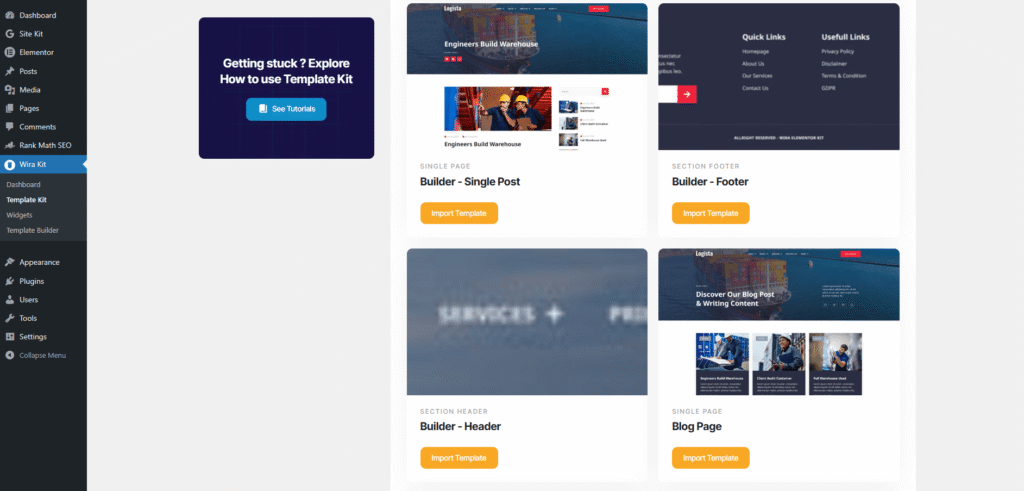
Examples:
These templates must be assigned inside:
Wira Kit → Template Builder
Assign them to their appropriate display conditions (Header, Footer, Single, Archive, etc.).
Templates Starting with “MetForm -”
Templates beginning with:
Must be assigned inside:
MetForm → Forms
After assignment, you can use the form inside Elementor using the MetForm widget.
Final Steps
After importing and assigning all necessary templates:
- 1. Review your pages.
- 2. Set homepage and blog page if required (Settings → Reading).
- 3. Customize content, images, and text to match your brand.